Viewing entries tagged
Poultry

Cassoulet

Cassoulet

Cassoulet may very well be one of the most rewarding dishes to make during the cold winter months; it is satisfyingly rich, tremendously flavorful, and, this is key, hard to screw up. Below is the recipe that I use as a guide when making cassoulet, but it’s a little different each and every time depending on what I have on hand (so don’t worry if you’re missing this or that).

If you’ve got a full day, take your time! The best cassoulet’s are cooked slowly at a low temperature. Beans hold their integrity best when cooked slowly, but even if they are cooked quickly, they’re still delicious - so work within the time frame you have.

At its heart cassoulet is a bean casserole, and I give you full permission to treat it as such even if it sounds fancy, French, and indulgent.


Cassoulet

Yield: 3-4 servings

2 cups dried flageolet beans or canellini soaked for at least 8 hours in

2 tablespoons vegetable oil, duck fat, or chicken fat

2 toulouse sausages

3 ounces pancetta, cut into 1/4 inch pieces

1 small yellow onion, diced

1 stalk celery, minced

1 carrot, minced

5 cloves garlic, crushed under your knife or palm

2 sprigs fresh thyme

2 sprigs fresh parsley

2 bay leaves

1 quart (4 cups) water or unsalted chicken stock, plus more as needed

1 teaspoon kosher salt, plus more as needed

1/2 teaspoon freshly ground black pepper

1-2 confit duck legs

1/2 cup breadcrumbs, optional

  1. Add the flageolet beans to a large bowl or container and cover with 8 cups of water for 8-24 hours in the fridge. If using canellini, soak for at least 12 hours.

  2. When the beans are finished soaking, it’s time to start cooking! Preheat a dutch oven or cast iron over medium high heat. When hot add in the vegetable oil (or your fat of choice) and the Toulouse sausages. Turn the heat down to medium. Brown the sausages on two sides, being careful not to burn the oil (you’ll know it’s burning if it starts to smoke). If things start to get smokey turn down the heat. When the sausages are golden brown on both sides, remove them from the pan and set aside for later use. The sausages do not need to be fully cooked as they’ll cook fully later in the oven.

  3. If you’ve burned the fat and it no longer smells delicious, carefully pour it into the garbage or compost and add new fat. Otherwise, add the pancetta into the hot pan and cook over medium-low heat until the fat has rendered and the pieces are golden brown.

  4. Add the celery, carrots, onion, and garlic to the pancetta and cook over medium heat until the onions are soft.

  5. If you’re in a rush to get dinner on the table, preheat the oven to 400°F, if you’ve got time, go low and slow and preheat it to 300°F. Remember that you can adjust the temperature as you go if you feel like things are moving to fast or slow for your liking.

  6. When the onions are soft, add the beans, thyme, bay, leaf, parsley, and 3 cups of water or stock. Turn the heat to high and bring to a simmer. Turn the heat down to keep at a simmer for 20 minutes. After 20 minutes, taste the beans to get a sense of how done they are and add more salt if needed. Note that flageolet beans will cook much faster than canellini.

  7. Place the sausages on top of the beans and move carefully to the oven. Bake until beans are nearly tender, adding more hot water or stock as needed to prevent them from burning; the beans should be just peaking out from the water. After 30 minutes, place the duck confit on top of the cassoulet and sprinkle with half of the breadcrumbs. Continue baking the cassoulet until the beans are tender. If a crust forms on top of the beans, crack it gently with a spoon to allow steam to escape.

  8. When you’re ready to eat, remove from the oven, sprinkle with remaining breadcrumbs (if desired), and eat while hot. Cassoulet tastes even better heated up the next day, so feel free to make this dish in advance or simply get excited about leftovers!

Low and Slow Cooking

Low and Slow Cooking

Low and Slow cookery comes in many different forms including braising, roasting, stewing, and smoking - but all forms share the same principle : low heat, for a long time. It’s generally reserved for tough cuts, which tend to be tremendously flavorful and inexpensive.

As a rule, we prefer meat to be tender and juicy rather than tough and dry. Unfortunately, these two qualities tend to be at odds. We’ll talk about this below, but first, let’s take a moment to discuss the main forms of low and slow cooking:

BRAISING: Item is cooked in a sealed pot or dutch oven with some liquid. Heat is transferred through air, water, and steam.

ROASTING: Item is cooked in an oven exposed on a roasting rack or tray. Heat is transferred through air.

STEWING: Item is cooked covered or uncovered, in the oven or stovetop, submerged in water. Heat is transferred through water.

SMOKING: Item is cooked over a grill. Heat is transferred through air (smoke provides flavor).

There is no “best way” to cook all proteins. To understand how to cook any cut of meat, it’s best to understand its characteristics. Is it Tough or Tender? Lean or Fatty? Big or Small? Skin on or Skin off? Sometimes knowing how you want to cook a cut is the most helpful information you can give your butcher when asking for advice on what to select.

Grilling and pan frying are best for tender cuts, whereas low and slow cooking tends to best serve tough cuts, fatty or lean.

These tough cuts tend to be very flavorful and generally come from areas of the animal that are doing the heavy lifting and moving; i.e., legs, butts, shoulders. These cuts generally have a significant amount of connective tissue called collagen, which if cooked for a long enough time at a low temperature (below boiling point, 212°F) will melt into gelatin. Collagen is gelatinized much more effectively with braising than in other forms of low and slow cooking, but given a long enough time at a low temperature, all low and slow cooking has the potential to turn collagen into gelatin. If this doesn’t sound tasty to you - trust us, it is.

Whether we cook meat for a short or long period, moisture loss is inevitable - this is why meat steams or splatters oil when it is cooked (water released from the meat hits the oil in the hot pan and quickly steams, leaving behind a pop or spray of hot oil that gets on our hands and, inevitably, our shirts (wear an apron!)). While these tough cuts might be drying out as we cook them, the gelatin produced by the melting collagen moisturizes the meat so it doesn’t taste dry. In braising and stewing, the meat will absorb some of the cooking liquid as it cools, reabsorbing some of its lost moisture.

Low and slow also gives us control over how “done” an item is. When braising, stewing, and smoking - we generally identify “done-ness” not by internal temperature, but by tenderness. However, when we are roasting, we may still want to reach an ideal internal temperature (think, turkey) and that’s much easier to do when we are cooking slowly (unlike when you forget about that flank steak under the broiler for an extra couple minutes and it shifts quickly from a perfect medium-rare to well and scorched…)

Cooking rules of thumb:

1) When possible, first sear your meat. Cooking over low temperatures, especially when braising or stewing, will never give you the same flavor development as searing, so it’s best to sear first (get that Maillard reaction!) and then braise or stew. With tough cuts like ribs, I like to cook them slowly in the oven with a bit of beer or stock until very tender and then grill them (reverse sear) to achieve the same flavor development. When roasting, make sure you rub the meat with oil or another fat to help the surface of the meat brown as it roasts (no need to sear first).

2) Avoid a boil. When braising or stewing, avoid letting the cooking liquid come to boil. If it is boiling, turn the temperature down, or if covered with a lid, keep the lid slightly ajar.

3) If burning, turn it down. If you’re roasting or smoking and the outside of the meat is browning before it has become tender, ignore your recipe and turn the heat down. Let the tenderness guide the cooking process, not the other way around.

4) Give it time. Be patient. These projects are best started a day in advance so they can cool fully in their cooking liquid before reheating and serving. The flavor and texture will be better this way.

As a cook, I prefer braising and stewing for my toughest cuts. I lean on these methods heavily because I love the infusion of flavor and moisture they provide. Sure, my pork shoulder is theoretically drying out as I cook it, but it’s also absorbing the liquid it’s cooking in to compensate.

Some of our favorite cuts to cook low and slow:

  • Pork shoulder

  • Pork picnic

  • Pork, beef, lamb shanks

  • Pork ribs

  • Beef chuck

  • Beef brisket

  • Oxtail short ribs

  • Any neck meats

  • Poultry legs

Wine-braised brisket with Turnips and Juniper

Yield: 4 servings

3 pounds brisket
1 teaspoon freshly ground black pepper
1 teaspoon juniper, finely ground
1 teaspoon plus 1 tablespoon kosher salt, plus more to taste 1 teaspoon vegetable oil, plus more as needed
1 large onion
1 cup canned whole tomatoes, finely chopped with their juice 4 cups chicken or beef stock
1 bottle dry white wine (something you’re willing to drink!)
1 teaspoon pepper
2 teaspoons juniper berries, whole
Fresh thyme, rosemary, and sage sprigs
1 pound turnips, halved
1/4 pound carrots, washed and halved or diced

- Sprinkle the brisket with black pepper, juniper, and salt. Rub the seasoning into both sides of the meat. Leave to marinate and rest for at least 30 minutes at room temperature, or up to 8 hours (place in the fridge if seasoning for more than two hours). Before moving on to the next step, bring the the brisket to room temperature.

- Preheat an oven to 250°F.

- If the surface is very moist, dry the brisket thoroughly with paper towels. Preheat a dutch oven or a deep cast-iron pan over high heat. Add in 2 tablespoons of vegetable oil, and add the brisket to the pan. Sear, over high heat, getting all sides a deep golden brown. Remove the brisket from the pan and set aside.

- Turn the heat down to medium high, and add the onion to the pan, along with a big splash of the white wine. Cook the onion for 8 - 12 minutes, until softened.

- Return the brisket to the pan, and add the chopped tomatoes, stock, remaining wine, juniper, and herbs. Move the brisket to the oven and place a lid on top. Keep the lid slightly ajar, this will prevent the liquid inside from going above 212°F (boiling).

- Braise for 2 to 3 hours, or until almost tender when a butterknife is inserted into the brisket. Add in the turnips and carrots, and continue to cook until a butterknife can be easily inserted into the tender brisket.

- When tender, allow the brisket to cool in the remaining braising liquid before slicing.

- Once sliced, place back into the braising liquid to reheat slightly before serving.

Pot Pies

Pot Pies

Hi all!

With the colder months upon us, and Thanksgiving leftovers in the fridge, we thought it high time to share one of our favorite recipes - the endlessly versatile pot pie. Use left over turkey or chicken, or cook the turkey or chicken as you go. Buy the crust or make your own crust. Add more peas if you like them, fewer if you don’t. Mushrooms to add to that umami richness, or extra leeks if you like your alliums. I encourage you to use this recipe as a guide, and then make it your own!

Note that this recipe yields two pies! If you’re certain you can’t eat two over the course of the winter, then divide the recipe in half. Otherwise, I encourage you to make the larger batch and freeze the leftovers. Chicken pot pie ingredients are very nice to have in the freezer.


Chicken or turkey POT PIE

Yield: two pot pies

Crust*:

Yield: 2 top and bottom crusts. If you only want a top crust, divide the recipe in half.

400g all purpose or pastry flour (pastry flour will yield a flakier crust)

150g unsalted butter

50g leaf lard (sold at the shop)

1-3 teaspoons ice water

1 teaspoon kosher salt

*Yes, of course you can buy a store-bought crust if you prefer!

Egg wash:

1 egg

1 tablespoon milk or cream

Filling:

Yield: Enough filling for two pies

5 pounds uncooked, bone in, skin on turkey or chicken OR 8 cups pulled (not packed) cooked turkey or chicken

2 teaspoons kosher salt

2 tablespoons high heat oil

4 carrots

4 ribs of celery

1 large yellow onion or 1 large leek (or a bit of each)

3-4 bay leaves

6 - 10 leaves sage

3-4 sprigs fresh thyme

1/4 - 1/2 cup cream or milk

4 cups chicken or turkey stock (preferably unsalted so you can season to taste)

5 tablespoons butter, room temperature

8 tablespoons flour

2 cups frozen peas

1 pound mushrooms (a mix of chanterelles and cremini work nicely), optional


CRUST ASSEMBLY:

  1. Visit the store and pick up some leaf lard (and whatever you need for your filling!)

  2. In the bowl of a food processor combine the flour and salt.

  3. Cut the cold butter into 1/2 inch pieces and add them and the lard to the flour. Pulse until the butter is in pea sized pieces and well distributed throughout the flour. Then drizzle in a tablespoon of water at a time until a dough starts to come together. It’s very hard to tell if you’ve added enough water without touching the dough, so after every addition of water, take a small handful of dough and squeeze it. If it falls apart like sand, it needs more water, if it comes together, it’s ready.

  4. Move the dough onto a clean counter and gently press it together until it is one cohesive piece of dough. If it is very sticky, gently knead in a bit more flour. If it is very dry, drizzle in a bit more water. Cut the dough ball in half, and press each half into a disk. Wrap both halves tightly in plastic wrap and move to the fridge.

  5. Make your filling!

  6. While your filling is cooling, preheat an oven to 400°F.

  7. Remove one piece of dough from the fridge and divide it in two piece. Using as much dusting flour as necessary to prevent the dough from sticking to the counter, roll each piece into a circle large enough to cover the bottom or top your pie pan. The dough should be roughly 1/4 inch thick.

  8. Drape one piece over the pie pan and gently press it into the bottom of the pan.

  9. OPTIONAL STEP: If par-baking your crust (which will ensure a crisp bottom crust rather than a soggy one), gently press a large piece or two of foil on top of the pie crust and fill it with pie beans (or whatever dried beans you have at home in your pantry). The beans will keep your pie crust flat as it bakes. Bake for 30-40 minutes, or until it’s lightly golden and you can easily lift the foil from the pie crust without it sticking to the crust. Remove the foil carefully and pour the beans into a container for the next time you need pie beans.

To bake:

  1. Allow the crust to cool for 10 minutes, then add in half of the filling and drape the other piece of rolled out dough over the top. Seal and trim the edges as desired. Brush the top with egg wash and cut at least 6 to 8 1” slits into the top crust so steam can be released without tearing the crust.

  2. Bake at 350°F until golden brown.

  3. Repeat with second pie or freeze the filling and crust until you’re craving a second pie. The dough can be frozen in the disk form and thawed overnight in the fridge before rolling it out. Alternatively, you can freeze the fully assembled unbaked pie. If doing this, do not par bake your bottom crust.

FILLING ASSEMBLY:

If using raw chicken, start here (if not, see below):

  1. Visit the shop and buy your chicken or turkey, leaf lard, butter, and onions.

  2. Once home, unwrap the chicken and sprinkle 1-2 teaspoons of salt over the pieces.

  3. Preheat a dutch oven or similar medium-large pot (ideally one with a heavy bottom and sides that are at least 4 inches tall).

  4. When the pot is hot, add in around 2 tablespoons of high heat oil. Carefully add the chicken skin side down to prevent splatter. Cook the chicken until golden brown on all sides, adjusting the heat as needed.

  5. Meanwhile, chop the carrot, celery, and onion (and/or leeks) into a medium dice.

  6. When the chicken is browned, remove it and set aside on a plate.

  7. If using, add the torn mushrooms to the pan and cook, until golden brown and soft. Resist the urge to mix your mushrooms too frequently or they will not brown. When softened and browned, remove them from the pan and set aside for later use. Next add in the diced carrot, celery, and onion into the chicken pan, and cook until softened.

If using cooked chicken or turkey, start here! The rest of you, continue on!

  1. If just starting, add a splash of oil to a large dutch oven or similar medium-large pot, ideally one with a heavy bottom and sides that are at least 4 inches tall. If using, add the torn mushrooms to the pan and cook, until golden brown and soft. Resist the urge to mix your mushrooms too frequently or they will not brown. When softened, remove them from the pan and set aside for later use. Next add in the diced carrot, celery, and onion into the same pan, and cook until softened.

  2. Add the bay and sage leaves, along with a healthy pinch of salt into the pot with the vegetables.

  3. When the vegetables are soft, add 1/4 cream or milk along with the stock. If you started with raw chicken: Add the pieces of chicken back into the pot since it’s likely not fully cooked yet. Bring the mixture to a slow simmer. After 15 minutes remove the whole pieces of chicken and set aside to cool. Once cool, remove the skin and bones and pull the chicken into bite sized pieces.

  4. Simmer the stock and cream mixture for 20 minutes, tasting and adjusting the seasoning as needed with salt and black pepper.

  5. Meanwhile, in a small bowl, using your fingers or a fork, mash the flour and butter together so it becomes a uniform paste. Add one tablespoon of the simmering liquid to the butter and flour mixture and combine, making it as smooth as possible. Add in two more tablespoons of the simmering liquid and combine. When the flour mixture is smooth, begin adding it to the simmering liquid, whisking it in as you go. Once all of the flour mixture has been added, add the pulled chicken.

  6. Cook over low heat, stirring regularly for 10 minutes, or until the mixture thickens. Add the peas and cooked mushrooms if using. Then taste, and adjust seasoning as needed.

  7. Move to a heatproof container and into the refrigerator to cool, or allow to cool for 20 minutes before adding to your pie shell, if the mixture is still very hot when you add it to the pie shell, the butter in the crust will melt.

  8. Once assembled (see above for detailed instructions) bake at 350°F until golden brown.


A beauty of a very large pot pie made by Russ

A beauty of a very large pot pie made by Russ


Turkey Tips

Turkey Tips

Turkey Tips

A primer on brining and cooking


Hi all!

As Thanksgiving approaches and turkey orders continue rolling in, we thought it would be a good time to offer up a little guidance around seasoning and cooking a turkey.

There is plenty of information available regarding the best way to season and cook a turkey - so our goal isn’t to tell you what is best, but to give you some information so that you can choose a method that will result in a delicious turkey without too much fuss.

No, we will not be walking you through the art of the deep-fried turkey nor the turducken - yes, we will talk you through the pros and cons of a dry brine versus a wet brine, and a whole turkey versus a spatchcocked turkey. As always, we will be selling Rain Shadow dry brine and wet brine mixes at the shop for your convenience - so once you decide which route to take, come visit us and let us help you get set up for the holiday. Additionally, this year we will be have (free!) brine bags for you, in addition to our standard Thanksgiving offerings!

Brining:

Before brining (wet or dry), take your turkey out of the vacuum pack and remove the neck and giblets. If you find that your turkey has a little ice on the surface, just run cold water over it for a few minutes until it melts (not necessary if you’re wet brining).

Wet Brine: Wet brining a turkey requires letting it sit in seasoned salt water for 24-72 hours. As the turkey sits in the salt water, it will absorb the salt and sugar from brine through osmosis. In addition to seasoning the bird, the salt absorbed from the brine causes the protein bundles in the meat to push apart from one each other, tenderizing it.

The pros: Well seasoned, moist, and tender meat

The cons: Difficult to store safely, pan drippings can be watery

If brining, we suggest using our Rain Shadow brine mix so that you don’t have to search for the perfect salt to water ratio. To prepare the brine, simply add the mix to a gallon of water and boil to dissolve the salt and sugar. It is VERY IMPORTANT to cool the brine completely in the refrigerator. Once cooled, move to a brine bag (which we have for you at the shop!) and submerge the turkey. Leave the turkey in the brine for up to 24 hours, flipping if necessary. If you run out of room in the fridge, consider placing the turkey in its bring bag, into a cooler. Surround the brining turkey with ice, but do not put ice in to the brine bag as this will dilute the brine. Remove the turkey 2 - 24 hours before cooking so that the surface of the turkey can dry out, ensuring a crisp, golden brown skin upon roasting. Please note that the skin of the turkey will burn very quickly if it’s not removed from the brine at least two hours prior to cooking. This is because the sugars from the brine sit on the skin of the turkey and tend to caramelize too quickly unless given enough time to equalize.

Dry Brine: Using a dry brine simply requires that you rub the seasoning salt over the surface of your turkey. While it doesn’t add moisture the turkey, it will result in a well seasoned turkey. If salting more than 24 hours in advance, I suggest placing it into a brine bag or placing it onto a tray and covering it with plastic. Just like with a brine, as the turkey absorbs the salt from the rub, the salt will breakdown the protein structure which causes the proteins to lose some water. This makes the meat more tender, and if covered, the moisture that is lost will be re-absorbed. (This is the same reason we suggest cooling braised meat in its braising liquid; denatured proteins will reabsorb some of their lost moisture.)

The pros: Easier to store in your fridge, well seasoned, better drippings for gravy, crispier skin

The cons: Less moisture than a wet brined turkey

Place the turkey on a rack over a baking tray. If using the Rain Shadow Dry Rub, rub it liberally over the surface and the cavity of the turkey. Move the turkey to the refrigerator overnight. This allows the skin to dry out which will ensure even browning. Just the same as brining, uncover the turkey 2 - 24 hours before cooking so that the surface of the turkey can dry out, ensuring a crisp, golden brown skin upon roasting. When cooked through, remove from the oven and let rest at least 20 - 30 minutes before carving. You can keep your turkey hot for up to an hour by covering it with foil and draping a kitchen towel or two over the top to insulate.

Roasting:

Spatchcocked vs. Whole Turkey Cooking

Ten years ago a good friend and I had a disagreement over the best way to cook a turkey. He wanted to spatchcock it, I wanted to roast it whole. We ended up having two turkeys on the table that year, and it remains a particular diplomatic low for me.

So let’s talk it out:

Spatchcocking: Spatchcocking (or butterflying) has become very popular in the last decade. To spatchcock a turkey, the back bone is removed so that it can be flattened. It helps ensure an evenly cooked bird, since the breasts (which are the most susceptible to overcooking) lay flat with the rest of the meat, and decreases the cooking time substantially. This is a fantastic approach for those of you with small ovens and many other things to bake, or for those of you whose greatest fear is an overcooked turkey breast.

Whole Turkey: It’s classic! And yes, can result in a poorly cooked turkey if you’re not attentive. Whole turkey roasts can be tricky to cook well since the breasts will inevitably be slightly overcooked by the time the legs are cooked through. Unfortunately, there is no magic solution for this. What I can suggest is that when your turkey is cooked through, that you let it cool for 20-30 minutes, remove the breasts and slice them very thin and then bury them in the gravy that you made from the drippings (while your bird was cooling).

To roast: Bake your Turkey at 300°F. Roast until the turkey is golden brown and deepest part of breast registers 150°F on meat thermometer and legs register at least 160°F. If you’re roasting it whole, this should take 3 to 4 hours for a 10-14 pound turkey. Check on the turkey after about 2 hours, and if the skin isn’t browning, increase the oven temperature by 50°F (remember, every oven is different!). When cooked through, remove from the oven and let rest at least 20 - 30 minutes before carving. You can keep your turkey hot for up to an hour by covering it with foil and draping a kitchen towel or two over the top to insulate.

What about the stuffing?

Stuffing is best left as a side dish. Stuffing your bird will mean that it’ll take longer to cook, and by the time the stuffing is safely at 155°F, the rest of your bird will be overcooked. In lieu of stuffing, toss some garlic, herbs, a lemon or two, and plenty of salt into the cavity of the bird.

Troubleshooting:

(speaking from experience here)

Turkey is overcooked: Oh well! Make a quick gravy (equal parts butter and flour, stock, and pan drippings). Encourage your guests to pour it all over the turkey, it’ll contribute an illusion of moistness. Remember that you’ve done a kind thing in offering to cook the turkey, feel a solidarity to all the other cooks who have accidentally overcooked their turkey while hosting, and don’t beat yourself up.

Turkey is undercooked: Yikes! If you’ve already let the bird cool and the breasts are done, feel free to cut them off and then place some foil where they once were. Slip the bird back into the oven and let it continue to cook until done.

You dropped the turkey: Give it a rinse, shake it off (literally and figuratively), have an extra glass of wine.

Classic Roasted Chicken

Classic Roasted Chicken

Classic Roasted Chicken

Yield: 3-4 servings


Hello friends!

It’s been a while since we’ve had time to say hi, but we are back! Moving forward this page will be a resource for you - one that will compliment the information we give you in the shop and can serve as a reference point when you need a little inspiration or information.

It felt only appropriate that we jump in and re-start this blog with a classic - one that will never let you down and that is good straight from the oven or as leftovers right from the fridge - the humble and spectacular roasted chicken. Here at Rainshadow, we like to keep our chicken simple. Our birds are air dried and then coated with olive oil, a heavy sprinkle of salt and freshly ground black pepper. At home, you have the opportunity to truss and season as you desire, we just encourage you to keep it simple.

You will need:

1 whole bird, 3-4 pounds

2-3 teaspoons kosher salt

1 teaspoon freshly ground black peppers

1 tablespoon roughly chopped fresh herbs (thyme, rosemary, sage, marjoram), optional

2 teaspoons zest (lemon or orange), optional

1 tablespoon olive oil (please don’t use your fancy stuff)

Optional: potatoes, root vegetables, carrots, cauliflower, and/or onions for roasting alongside your bird

Dry the bird: Place your chicken on a plate and let it sit, uncovered in your fridge for up to 24 hours in advance of roasting. This will allow the surface of the chicken to dry out, resulting in a crispy, golden skin.

Season the bird: If you have the time (and the foresight), season your chicken (inside and out) with the salt, pepper, and any additional herbs and/or zest you are using up to 12 hours in advance. Leave the chicken uncovered in the fridge. Before roasting, you’ll rub on the olive oil, making sure the entire surface of the bird has a thin coating of oil.

If you don’t have the time (or forgot), don’t worry! Simply remove the chicken from the fridge and season your chicken (inside and out) with olive oil, salt, pepper, and any additional herbs and/or zest you’re using. Use your hands to rub the seasoning evenly over the chicken.

Preheat an oven to 450°F, making sure an oven rack is in the middle of the oven.

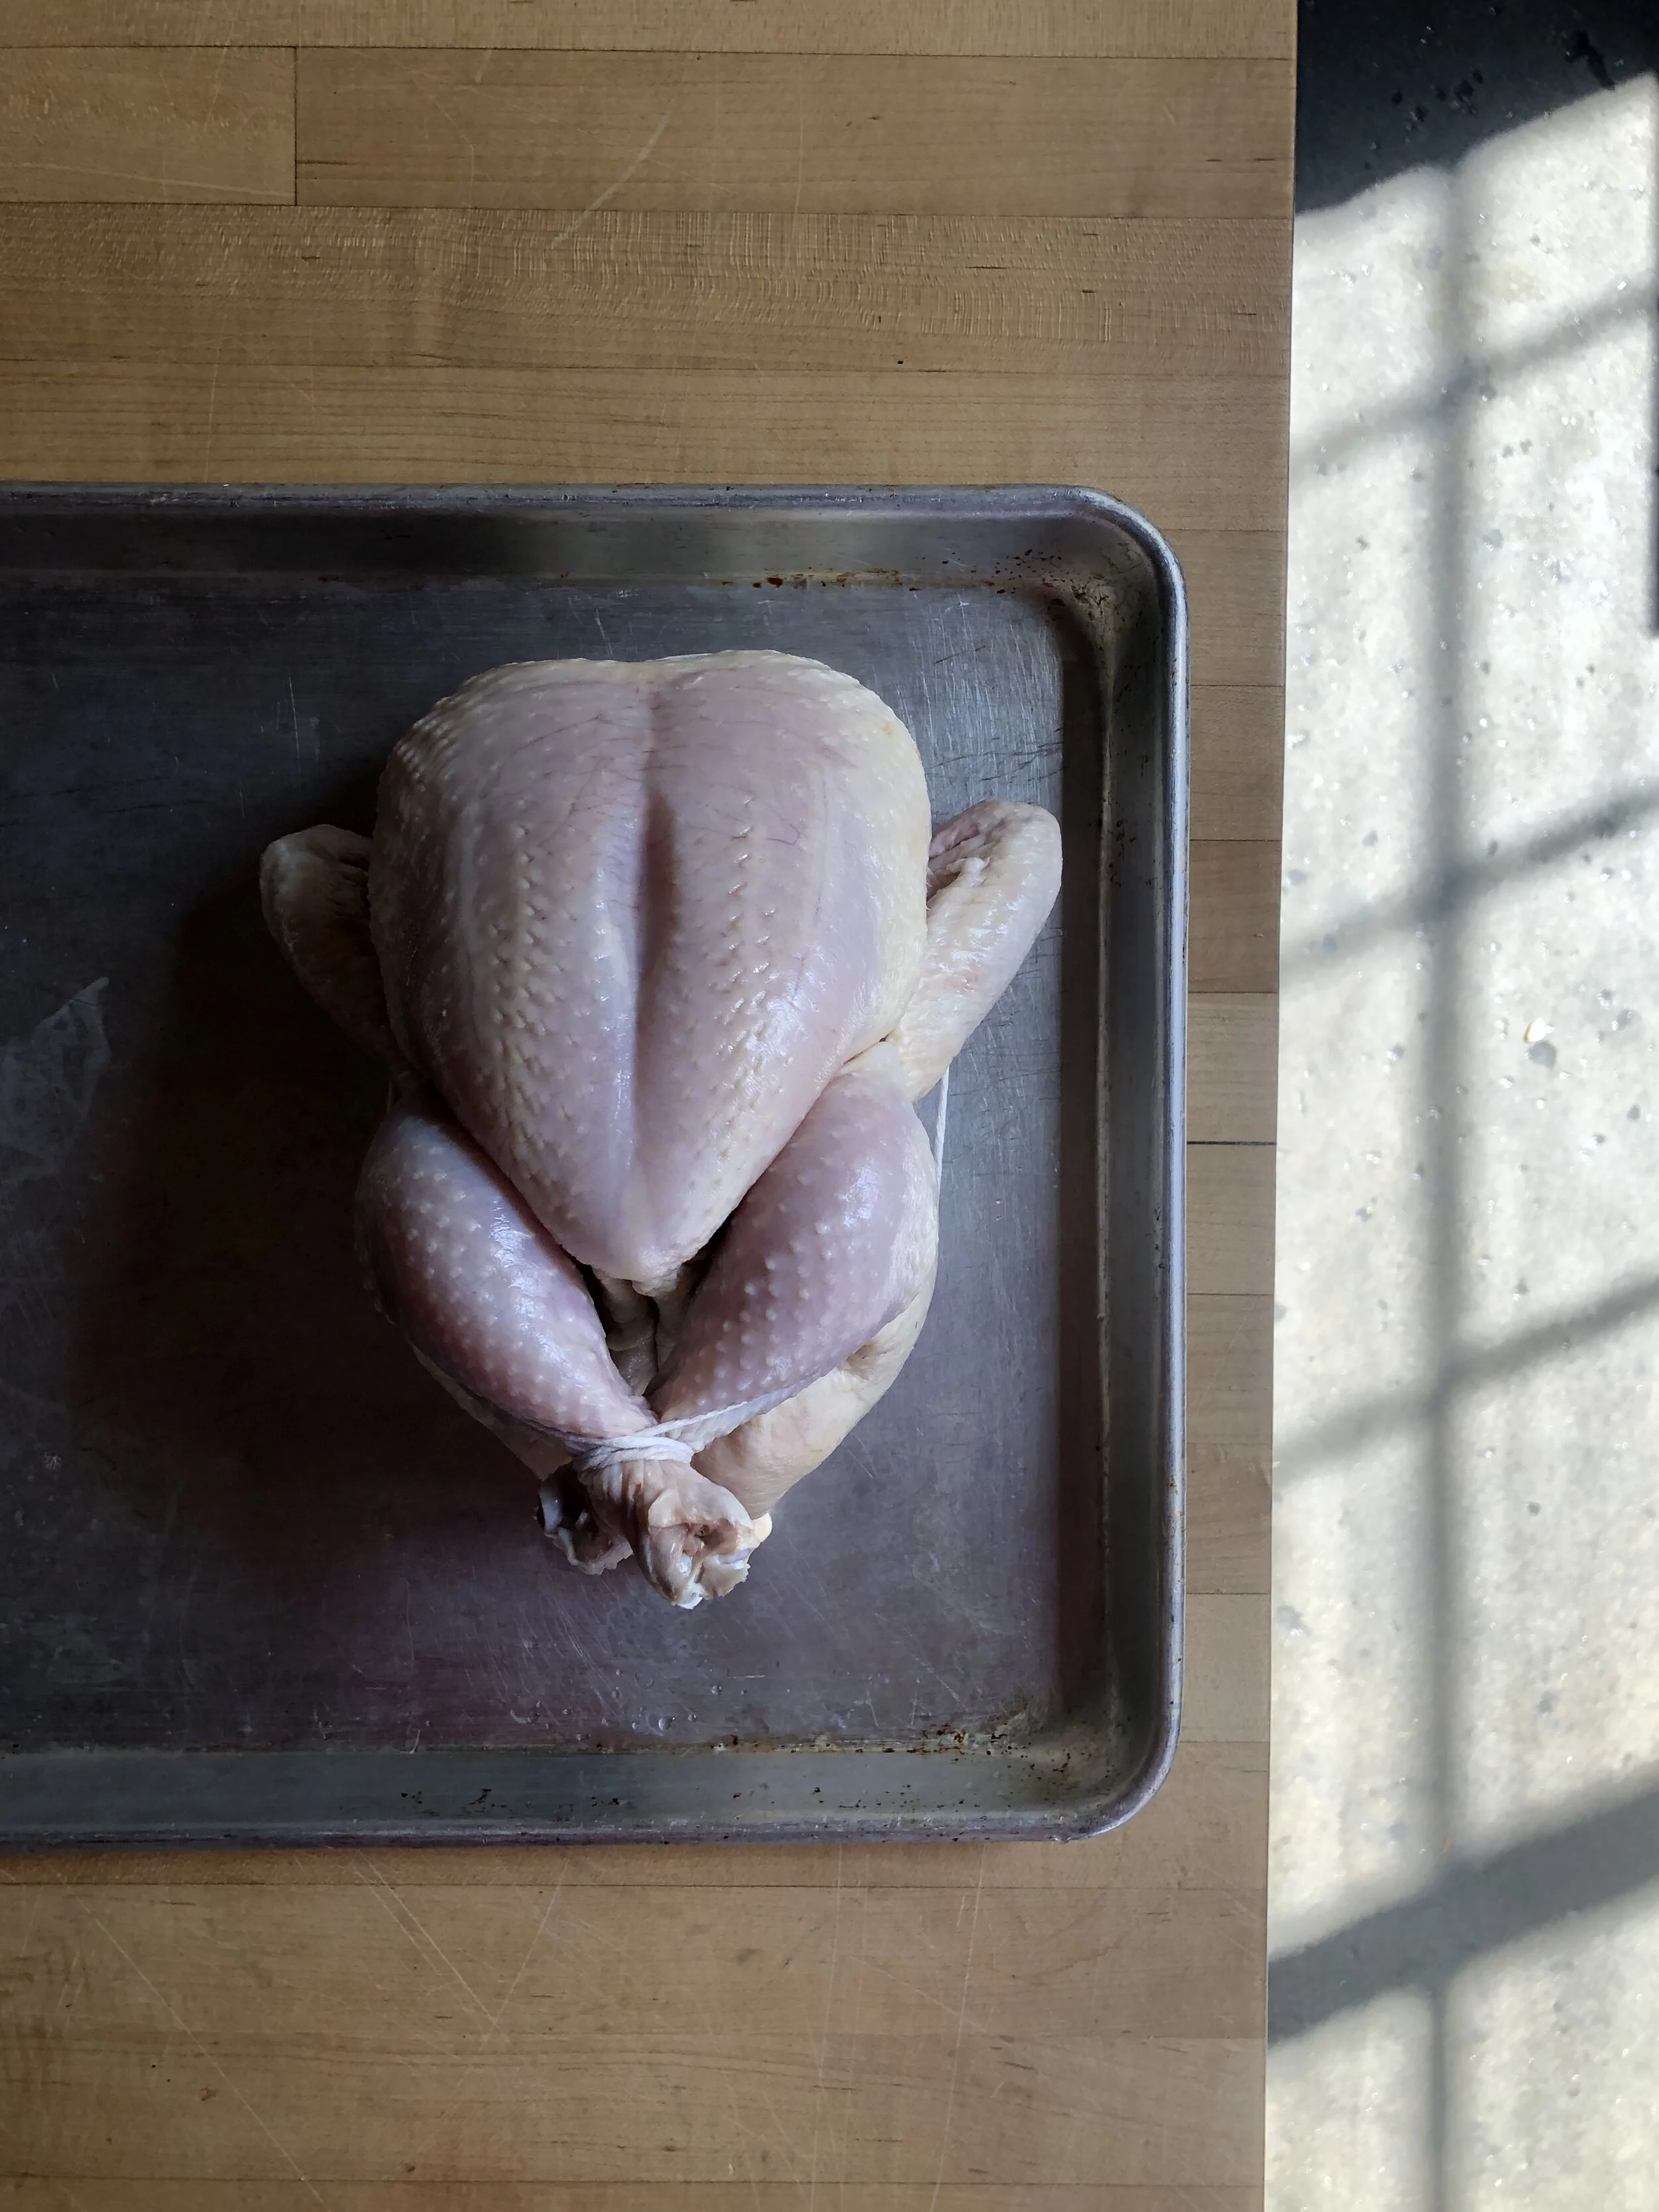
Truss the bird: Trussing your bird isn’t difficult, and will improve how evenly your bird cooks. The basic idea is to keep the legs and wings close to the body, we do this by simply tucking the wings up and behind the birds back (like it’s raising a hand and then scratching its shoulder), then we use a piece of twine to secure the birds legs close to its body. Trussing guide coming soon!

Roast the bird: When the bird is trussed and the oven is hot, place your chicken onto a baking tray or into a cast iron pan. If desired, toss any vegetables you would like to roast with the bird in salt and olive oil and add them to the tray or pan to roast alongside your chicken. Potatoes, root vegetables, carrots, cauliflower, and onions all work particularly well. Move the bird and the vegetables to the oven.

Eat the bird: After 50-60 minutes, your chicken should be cooked through and ready to go. If you have a thermometer, use it! FDA guidance suggests you cook your chicken to 165°F, so we suggest pulling your chicken out of the oven when it reached 155°F to account for carry over cooking (and to prevent it from overcooking). Always check the temperature in a few places. Without a thermometer, use the bird’s skin as a guide. Once golden brown, use a knife to make a small incision between the body and the leg. If the meat is white, without traces of pink and the “juices run clear” - you’re good to go! Let the chicken rest for 15 minutes before carving. This rest time allows the proteins to reabsorb some of the moisture lost during cooking.

Carve the bird: Separate the legs from the body and slice at the joint to separate the thigh from the drumstick. Remove the wings. Remove the breasts from the cavity by slicing along the breast plate and then sliding your knife between the ribs and the breast meat. The breast should come off with relative ease. Repeat on the the other side by slicing on the other side of the breast plate. Carving guide coming soon!

Serve: Serve as desired: We suggest adding roasted vegetables, a salad, a little Dijon mustard for dipping, and some crusty bread to soak up that pan sauce.

Leftovers: Store any leftovers in the fridge and consume within 5 days. Add chicken to sandwiches, eat it cold, make it into chicken salad, warm it gently in the oven, warm it in tomato sauce with plenty of capers and garlic - the options are (seemingly) endless. We suggest keeping any leftover bones in a bag in your freezer for stock. When you’ve accumulated enough bones (raw and roasted both work!), add them to a pot, cover them with cold water, add in a few bay leaves and peppercorns as well as some roughly chopped carrot, onion, and celery. Simmer for a minimum of 2 hours and up to 12, adding more water as needed.


Meat-Lovers Guide to Camping

Meat-Lovers Guide to Camping

August is camping season for many Seattleites hoping to explore the Pacific Northwest. When Russ from Rain Shadow Meats hits the trails to camp for the weekend, there are a few essential cooking tools and ingredients he can't leave home without.